Integrating Blue - Procreate Lettering Brush into Your Digital Design Workflow
In the evolving landscape of digital illustration and graphic design, the tools we choose often dictate the efficiency and quality of our output. For iPad users working within the Procreate ecosystem, selecting the right brush is not merely an aesthetic choice; it is a strategic decision that impacts workflow speed, consistency, and client satisfaction. The Blue - Procreate Lettering Brush has emerged as a specialized tool designed to bridge the gap between traditional hand-lettering aesthetics and modern digital precision. This article explores how to effectively integrate this brush into your creative process, ensuring you maximize its potential across various professional and personal projects.
Understanding the Tool: More Than Just a Brush
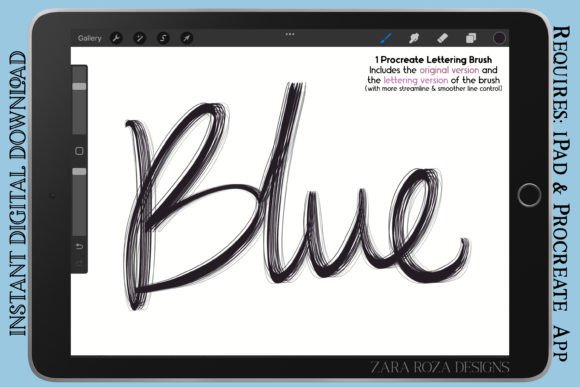
The Blue - Procreate Lettering Brush is engineered with a retro vintage aesthetic, offering pressure sensitivity that allows for dynamic thick-to-thin width variation. This feature is critical for artists who rely on line weight to convey depth, emphasis, and style. Unlike generic brushes that may require extensive tweaking to achieve a natural look, this tool is pre-configured to respond intuitively to the Apple Pencil. It serves multiple functions, acting as a liner pen for outlining details, a marker for bold illustrations, and a precise instrument for calligraphy and hand lettering.
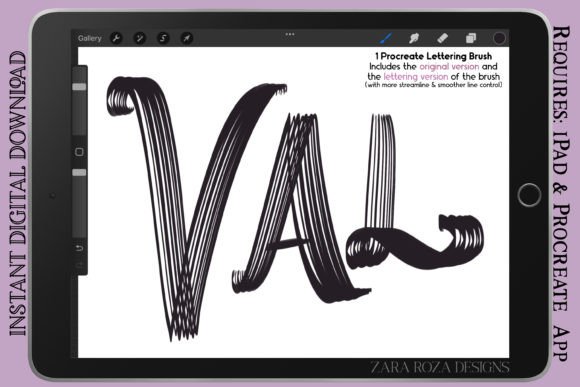
What sets this asset apart is its dual-version structure. It includes two distinct variations: the Original Version and the Lettering Version. Understanding the specific use case for each is the first step in optimizing your workflow. The Original Version offers regular line control, making it suitable for rough sketching, general drawing, and types of lettering that benefit from a more organic, textured feel. In contrast, the Lettering Version provides streamlined line control, ideal for polished hand lettering and smoother lines where consistency is paramount. By having both options available, you can switch contexts without changing tools or adjusting settings mid-project.
Pre-Production: Setting Up for Efficiency
Before beginning any project, proper preparation ensures that your tools work for you rather than against you. When incorporating the Blue - Procreate Lettering Brush into your toolkit, start by organizing your brush library. Create a dedicated group in Procreate for your primary lettering and inking tools. Place both versions of the Blue brush here for quick access. This organizational step reduces friction during the creative process, allowing you to maintain flow state.
Consider the nature of your upcoming task. If you are planning a complex comic page or a detailed fashion sketch, the rougher texture of the Original Version might be better suited for initial thumbnails and concept sketches. Its ability to handle rapid, loose strokes helps in brainstorming visual ideas without getting bogged down in perfectionism. Conversely, if your goal is a clean logo design or a polished portrait outline, you may want to prioritize the Lettering Version from the outset. Aligning the tool selection with the project phase helps maintain a logical progression from ideation to execution.
Execution: Applying the Brush in Real Workflows
During the creation phase, the Blue - Procreate Lettering Brush demonstrates its versatility across various disciplines. For hand lettering and calligraphy, the pressure sensitivity is key. Practice varying your stroke speed and pressure to master the thick-thin transitions. This technique is essential for creating aesthetically pleasing typography that mimics traditional ink markers. When working on bold illustrations or cartoons, use the brush for outlining. The retro vintage aesthetic adds character to line art, preventing digital drawings from looking too sterile or vector-like.
In the realm of character design, such as manga, anime, or chibi character art, consistent line weight is crucial for clarity. The Lettering Version excels here, providing the smooth control needed for clean contours around faces and clothing. For professionals working in graphic design or fashion sketches, the brush can be used to define structural lines while maintaining an artistic flair. When drawing makeup charts or portrait art, the finer control allows for delicate detailing around eyes and lips, ensuring precision without sacrificing the hand-drawn feel.
It is also important to note how this brush interacts with other Procreate features. Combine it with layer blending modes to create depth. For instance, use the Blue brush on a multiply layer for shadows or outlines, allowing underlying colors to show through naturally. This integration enhances the overall composition without requiring complex masking techniques.
Post-Production and Quality Control
After the initial drawing is complete, the review phase is where attention to detail pays off. Use the Blue - Procreate Lettering Brush for refinements. If certain lines appear too jagged or inconsistent, switch to the Lettering Version to smooth them out. This iterative process ensures that the final output meets professional standards. For entrepreneurs and marketers using these assets for social media content or branding materials, consistency in line quality reinforces brand identity.
When preparing files for export, consider the resolution and format based on the end use. For digital publications or web graphics, standard PNG exports may suffice. However, for print materials like posters or packaging, ensure your canvas is set to a high DPI. The vector-like quality of the smooth lines in the Lettering Version scales well, but maintaining high resolution preserves the texture and nuance of the brush strokes.
Long-Term Integration and Skill Development
Adopting a new tool is not a one-time event but a continuous process of learning and adaptation. Regularly revisit the capabilities of the Blue - Procreate Lettering Brush to discover new applications. Experiment with different canvas sizes and zoom levels to see how the brush behaves under various conditions. For educators and bloggers, documenting these experiments can provide valuable content for your audience, demonstrating practical tips and tricks.
Freelancers and small business owners can leverage this brush to streamline their service offerings. By mastering a versatile tool that handles everything from doodles to detailed illustrations, you reduce the need for multiple specialized brushes, simplifying your asset management. This efficiency translates to faster turnaround times and higher profitability. Additionally, the retro aesthetic appeals to current design trends, making your work relevant and marketable.
- Versatility: Suitable for lettering, line art, comics, manga, and fashion sketches.
- Dual Options: Includes Original Version for sketching and Lettering Version for smooth lines.
- Compatibility: Optimized for Apple Pencil and Procreate on iPad.
- Aesthetic: Retro vintage feel with dynamic pressure sensitivity.
- Efficiency: Reduces setup time and enhances workflow consistency.
Conclusion
The Blue - Procreate Lettering Brush is more than a digital asset; it is a workflow enhancer that supports a wide range of creative endeavors. By understanding its dual versions and integrating them strategically into your pre-production, execution, and post-production phases, you can achieve higher quality results with greater efficiency. Whether you are a seasoned professional or a hobbyist looking to refine your skills, this tool offers the flexibility and precision needed to bring your digital visions to life. Embrace the process, experiment with the settings, and let the brush become a seamless extension of your creative intent.